Opening up the fretboard with visual symmetry.
We are visual creatures by nature and being able to see patterns in everyday life helps us make sense of things. (Most of the time. Hopefully…)
When you think of it, our brains lives for patterns. When we know someone, like our best friend, we can usually predict how they will react in certain situations because we are familiar with their personalities. This is because we have seen patterns in their behaviour previous to said situation and hence our brain draw from these past experiences to formulate some expectation of how our friend will (should) behave. Of course humans are wildly complex creatures and we can never truly know how people, even the familiar ones, will react to stuff.
Luckily guitars are far more predictable and, within the confines of standard-tuning, patterns will look and be similar on all strings. (the beauty of the 12-tone western scale…) Let me explain.
Look at this little diagram with the notes C, D and E below. The succession of notes visually LOOKS the same on ALL strings.
Now if we take something a little more useful like a C major arpeggio starting on C with the index-finger we will get this little triangle. (Everything on the guitar can be seen as triangles. Or multitudes of the buggers!)
We can also start the SAME notes with the pinkie:

Or one of the middle fingers. (Middle or ring depending on arpeggio and preference.)
Now, if we take the above little triangle and fill out all the E’s to the right of C on the same string, and all the G’s one sting down, we get this little pattern.
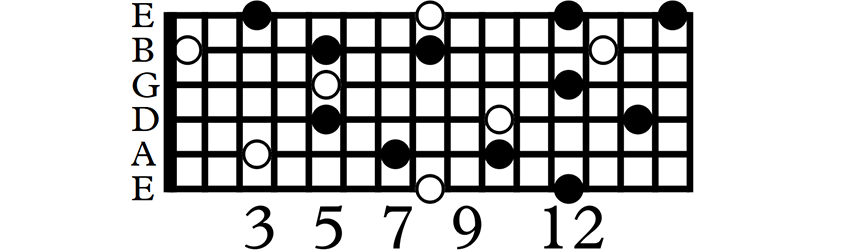
You can see that ALL of the previously mentioned patterns are found here!
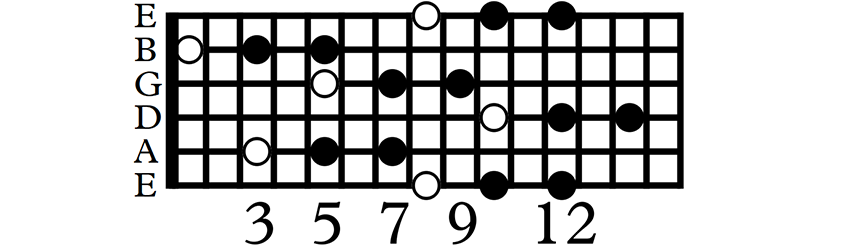
Now, what we’re going to do is link one pattern (or shape) on three string-pairs. A string pair will be considered strings adjacent to each other: 1+2 (E+B) , strings 3+4 (G+D) , strings 5+6 (A+E) strings 2+3 (B+G) and strings 4+5 (D+A). Obviously we can make string-pairs of whatever we want to eventually!
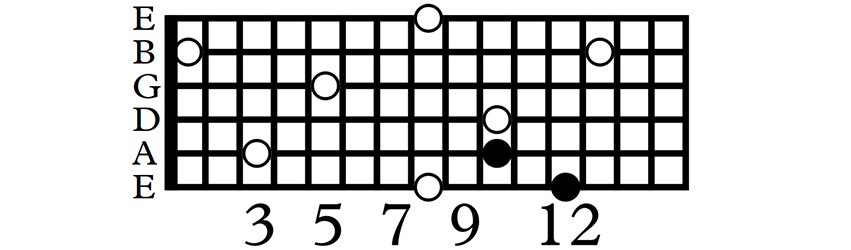
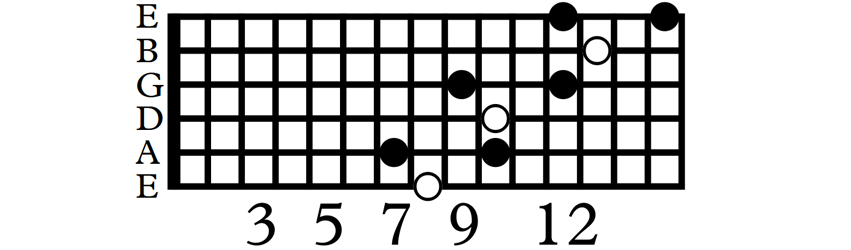
Here is a C major arpeggio starting from C on the 8th fret on the low E string. This pattern then just duplicates itself from the D string and then the B string.
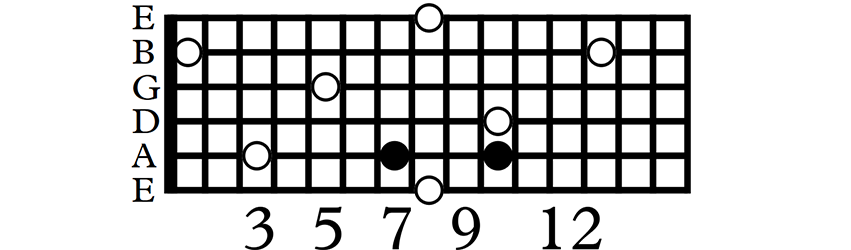
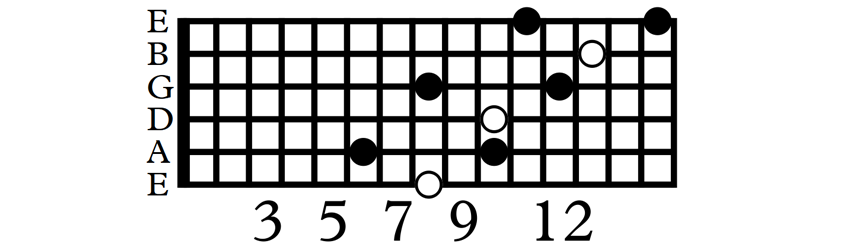
We can do the same thing with a minor arpeggio. All we need to do is lower the 3rd of the chord. In this case it will be the note E lowered to Eb. (For all chord formulae click this text to download for free!) C minor will thus be spelled: C, Eb, G.
Now these little one-octave shapes can be played by themselves or in a cascading manner. For individual playing check out Yngwie Malmsteen and other neo-classical guitarists. What we’re going to look at though is playing these in a cascading manner, and to make things even cooler, play all arpeggios as 7th chords. Again, to get hold of a nice PDF on which all chord formulae can be viewed and printed, click here!
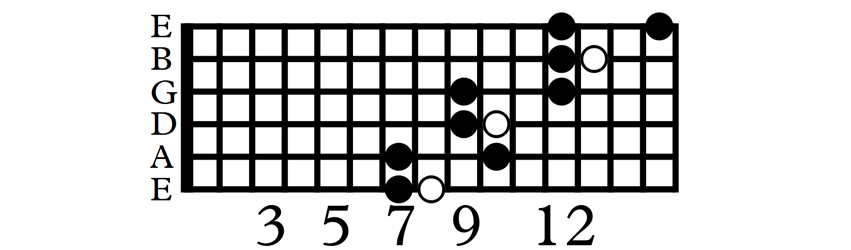
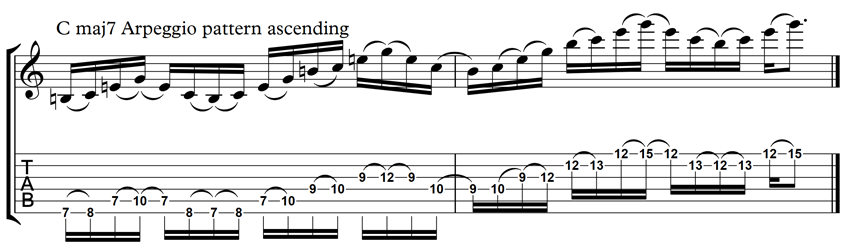
Here is one of my favourite Major 7 (maj7) shapes to play, and we will explore this concept in more detail later on.
I would normally play the shapes using hammer-ons and pull-offs depending on the situation. Have a look at this TAB:

And here’s the Minor version:

Now you can add nice sounding sequential patterns to it:
And the descending version:

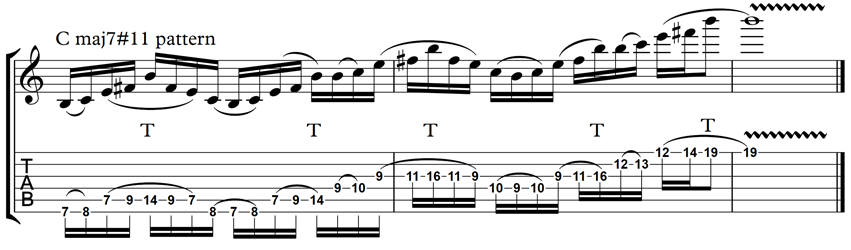
This here is one of my favourite patterns using these symmetric patterns. This sequence is based on a maj7#11 chord and consists of the root (C), third (E), sharp 11 or 4 (F#) and major seven (B).
The seventh is tapped with the right hand finger whereas the left hand notes are all tapped (or hammered from nowhere) and no picking strokes are used. I would suggest you first just do the one pattern (on the low E and A strings) and it will come together pretty quickly depending how strong and accurate the left hand can produce the notes. Some overdrive or distortion could help bring out the notes but be careful of noise!
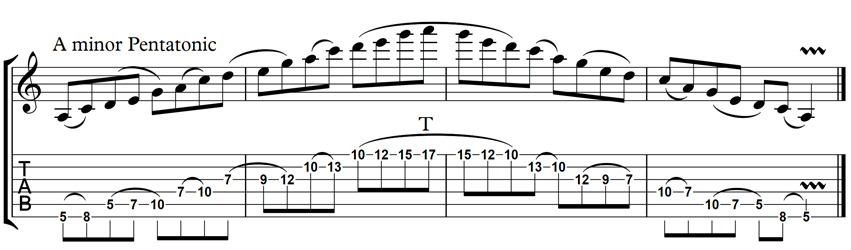
You can use these patterns over any arpeggio or scalar shape, including the humble Pentatonic. For the Pentatonic try using 2 notes on one string and 3 on the next as per the symmetric pattern below. This is an A minor Pentatonic and again as many notes are hammered and pulled off as to what it takes to execute this properly.
The idea behind SEEING these symmetric patterns across the neck is to make fingerings consistent for extended runs across the fretboard. These patterns are but a tool to mapping out the fretboard in logical ‘chunks’, to be summoned up in the heat of your solos.
The concept of visualisation goes a lot deeper than this but more on that in a later lesson.
Use these little tools to come up with some of your own licks and runs as soon as you are able to. The most important thing here is to get the idea of similar fingerings and patterns lying on multiple places on the neck. As soon as you start seeing that, the fretboard will light up like a flour factory without any ‘no-smoking’ signs. Enjoy!